Remote Control of a Brushed DC Motor
By Brandon Tsuge,
Introduction
In this post, we’ll learn how to assemble a brushed DC motor with a rotary encoder that is controlled by a radio transmitter.
Here are the parts I used for this demonstration:
Pololu 50:1 Brushed DC Gear Motor (https://www.pololu.com/product/4753)
I’m not and affiliate for Pololu, but I still recommend this, as it is a quality motor with thorough documentation).
Arduino Nano: https://amzn.to/37z5OJE
USB Cable for Nano: https://amzn.to/39MXSqW
DROK Dual DC Motor Driver: https://amzn.to/36LDx3y
Radiolink RC Transmitter and Receiver: https://amzn.to/3qvZsU6
Breadboard: https://amzn.to/3ge63xH
Jumper Wires: https://amzn.to/3owv6Pz
AA Battery Holder: https://amzn.to/36N3M9M
Glass Fuse Holder: https://amzn.to/37Fea2w
Glass Fuses: https://amzn.to/37CUvQP
A typical brushed, direct current (DC) motor has two leads. When a voltage is applied across these two leads, the motor shaft spins. Reversing the polarity of this voltage will reverse the direction of rotation of the motor shaft. DC motors are usually wired to a motor driver, which receive and interpret control signals to ultimately drive the motor’s speed and direction. Brushed motors like this are considered to be open loop, meaning they aren’t capable of sending back information about its shaft position or speed.

Brushed DC Motor
This type of motor becomes closed loop when a rotary motor is attached. In this case, the motor is driven in the same way as any other brushed motor. The only difference is that there is now the ability to measure the motor shaft position. Usually this type of motor will have 5 or 6 wires.
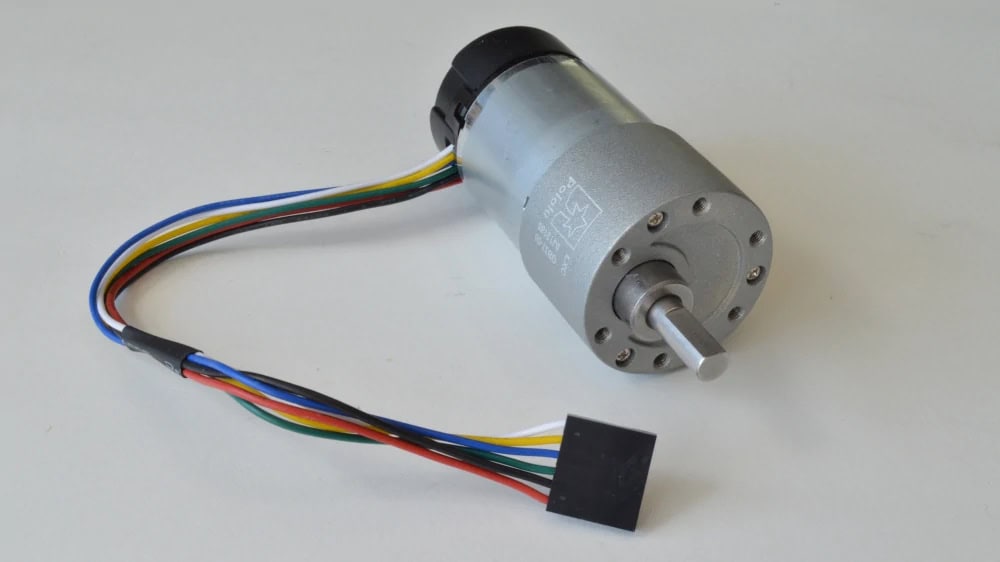
Brushed DC Gear Motor with Rotary Encoder
Two of the wires are used for the motor power and the other wires are used for the encoder. Essentially the encoder works by turning a signal on and off as the motor shaft rotates. These pulses are directly related to the motor shaft position. I like to use the analogy of a playing card flapping in the spokes of a bicycle wheel. The faster the wheel moves, the more times you hear the playing card making a noise. In the case of a rotary encoder, a high number of pulses over a given time period indicates a faster motors speed.
For this example I will be using a Pololu DC brushed motor with a 50:1 gear ratio and a rotary encoder with two outputs. It has red and green wires to power the motor shaft movement. It has a green wire for a ground for the encoder, a blue wire (Vcc) to receive a positive voltage between 3.5V and 20V, and a yellow and white wire to output separate encoder signals.

Rotary Encoder Wiring
Below is what the output signals would look like as the motor rotates. Notice how they are out of phase. The signals alternate between values of the supplied Vcc and 0V throughout the motor rotation. For this encoder, if you count the rising and falling edges of a single output, you will count 32 counts per revolution. If you count rising and falling edges for both outputs, you will count 64 counts per revolution. Since this is a 50:1 geared motor, a single rotation of the output shaft will result in a total of 3200 counts (50 x 64 counts).
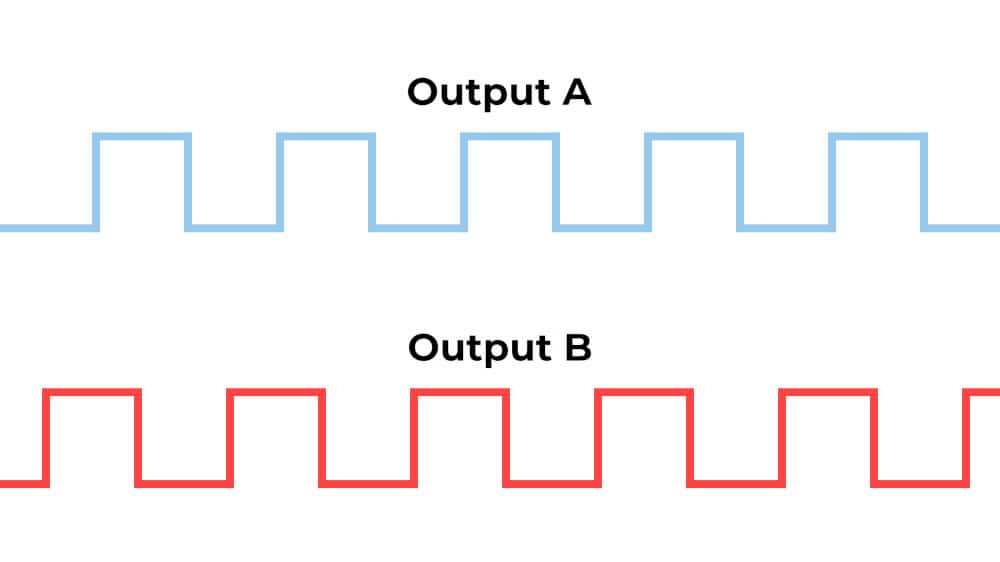
Rotary Encoder Output — Forward direction
The order in which the rising edge of a particular signal is read is an indication of direction. For instance, let’s say that when the motor is rotating clockwise, the rising edge of Output B is counted before the rising edge of Output A. If that was reversed, the rising edge of Output A is counted first, indicating that the motor is rotating counterclockwise.

Rotary Encoder Output — Reversed Direction
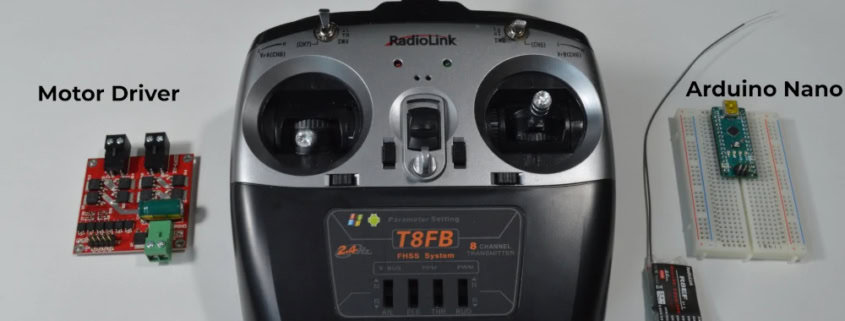
An Arduino Nano is being used to power the motor encoder and read the output values of the encoder. It is also sending signals to a dual motor driver to control the speed of the motor.
I’m also using an RC transmitter and receiver to send signals to the Arduino. Essentially, moving a stick on the controller transmits a signal to the RC receiver. The receiver sends a signal to the Arduino which interprets it and sends it to the motor driver. The motor driver receives the signal from the Arduino, interprets it and outputs power to the motor. All of these signals are pulse width modulated signals, which I will discuss in another post. Lastly, as the motor rotates, the Arduino reads the encoder values.
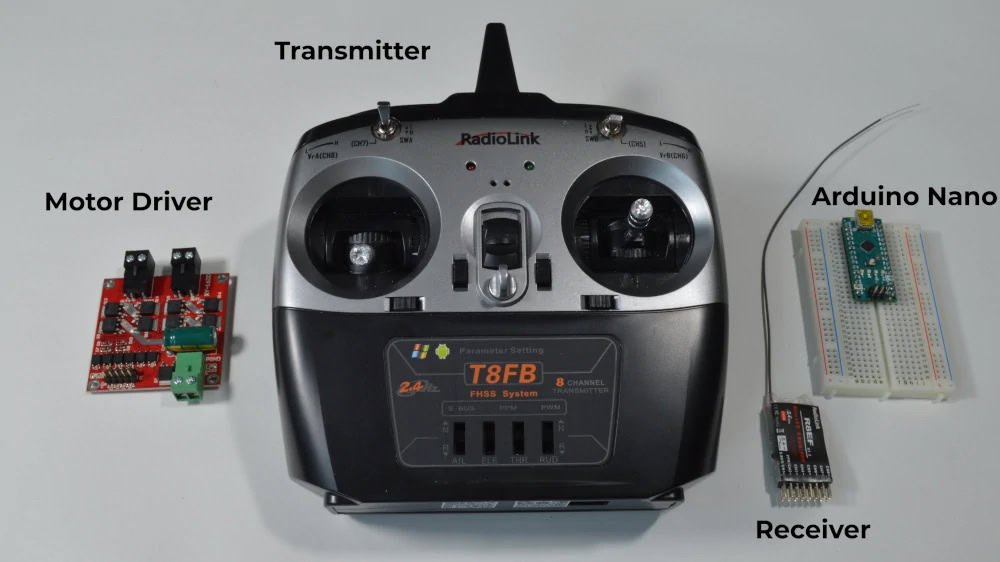
Hardware for Remote Control of a Motor
Wiring
To start this example, I place an Arduino Nano in a breadboard. I use wire jumpers to make connections to the components. The red and black wires on the motor are wired to one of the black sets of screw terminal blocks on the motor controller. The green wire is connected the Arduino ground and the Blue wire is connected to the Arduino 5V output. The yellow and white wires are attached to pins 2 and 3 on the Arduino.

Electronic Assembly of Nano and Motor-Encoder
For the motor driver, the tan screw terminal blocks receive power from an external power source between 6.5V and 27V. I’m using a AA battery holder and a set of 8 AA batteries for this example. The user manual for this board recommends putting a 10A fuse in between one of the leads of the motors and the motor driver and a 15A fuse between the positive end of the power source and the motor driver.
The motor driver also has a set of male header pins. These pins are what control the behaviors of the attached motors. If you look at these two pins, there are two columns. The left column is for one motor and the right column is for the other. The top pins are connected to 5V from the Arduino and the bottom pins are connected to a ground, also on the Arduino. The pins labeled ENA receive a PWM signal from the Arduino and are directly related to the motor speed. These can be connected to any Arduino pin capable of a PWM output. The pins labeled IN1, IN2, IN3, and IN4 control the direction of the motor. If IN1 has a value of 1 and IN2 has a value of 0, one of the motors will spin forward. If you reverse this configuration, the motor changes direction. This applies to the other motor output with IN3 and IN4. These pins can be connected to any digital pin on the Arduino
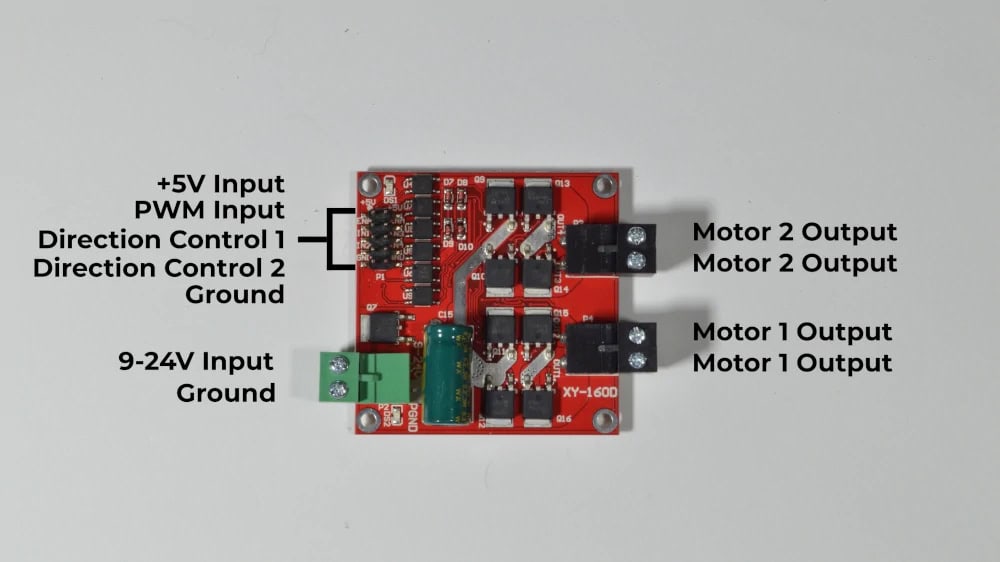
Dual Motor Driver Board
Lastly, I used and RC transmitter and receiver to indirectly control the motor speed. I chose to use Channel 3, which is the up and down movement on the left stick. I chose this channel because it is not spring loaded and will not return to the center position. The top pin connects to any digital pin on the Arduino, the middle pin is connected to 5V and the bottom pin is connected to ground.

Radio Control Receiver
Below is the diagram of the breadboard view.

Motor and Receiver System Wiring Diagram
Arduino Code
Setup: In this example I use 6 different digital pins. I set the pin leading from RC receiver to be an Input. The pins leading to the ENA, IN1, and IN2 pins on the motor driver are set to be digital outputs, and the pins connected to the rotary encoder outputs are set to “INPUT_PULLUP.”
I also use the “attachInterrupt” command to interrupt the loop and increment counting functions every time encoder outputs a “CHANGE.” Essentially I am counting the rising and falling edges of each of the encoder outputs. This can only be used with pins 2 and 3 on the Arduino Uno and Nano. If a second motor is needed, one encoder output on each motor will not be used. One encoder output per motor is often enough for most projects.
Loop: I start the loop be reading the RC PWM value using the “pulseIn” command. I write IN1 to “HIGH” and IN2 to “LOW” to establish a motor direction. I then use “if” statements to store the minimum and maximum values that are read from the RC receiver. I use this range to map the current RC PWM value to values between 0 and 255, since this is the range that “analogWrite” uses. This value is then sent to the ENA Pin to ultimately spin the motor.
Lastly, I print the counters.
Functions: I use two functions that simply increment two different variables. These functions are called every time the interrupts are initiated.
You should now be able to control the speed of the motor with the channel 3 joystick on the remote control.
Here’s where you can find a copy of my code here.

Motor Control Demo
Also, note that when you open of the serial monitor, the counters are increasing as the motor spins.
I hope this tutorial was informative.
The parts for this post were sponsored by Mechanical Design 101.

 MDA Press
 MDA Press
 MDA Press